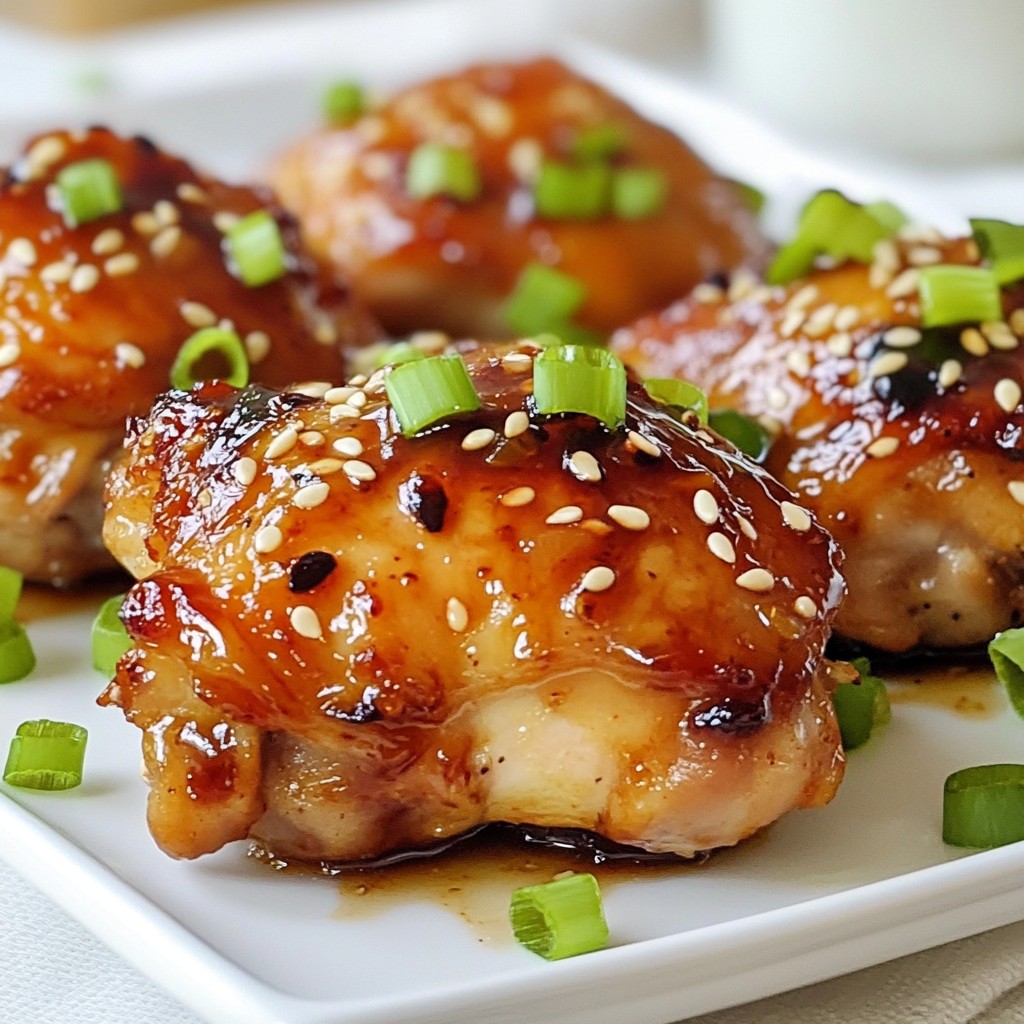
If you crave a dish that’s both tasty and easy to make, you’ll love this Baked Teriyaki Chicken Thighs recipe! Juicy chicken meets a simple teriyaki sauce, making every bite a burst of flavor. Whether you want a quick weeknight meal or a dish to impress friends, this recipe has you covered. Dive in now to learn how to prepare this delicious meal that everyone will enjoy!
Why I Love This Recipe
- Delicious Flavor: The combination of soy sauce, honey, and sesame oil creates a mouthwatering glaze that perfectly caramelizes during baking.
- Easy to Prepare: With just a handful of ingredients and straightforward steps, this recipe is perfect for weeknight dinners.
- Versatile Serving Options: These teriyaki chicken thighs pair beautifully with rice, quinoa, or a fresh salad, making it easy to customize your meal.
- Family-Friendly: Both kids and adults love the sweet and savory flavors, ensuring everyone at the table will be satisfied.
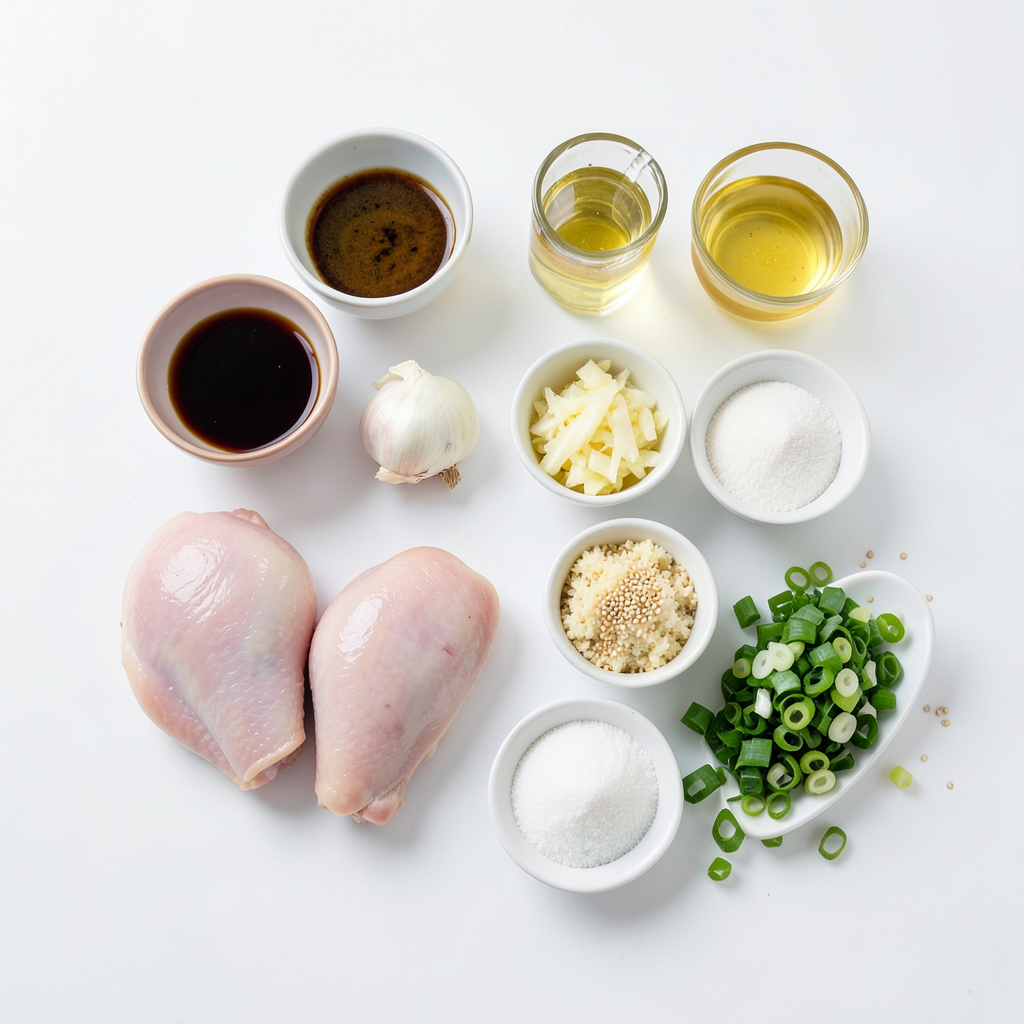
Ingredients
Main Ingredients for Baked Teriyaki Chicken Thighs
- 4 chicken thighs, skin-on and bone-in
- 1/4 cup soy sauce (low sodium preferred)
- 1/4 cup honey
- 2 tablespoons rice vinegar
- 1 tablespoon sesame oil
- 3 cloves garlic, minced
- 1 tablespoon fresh ginger, grated
- 1 teaspoon cornstarch
- 1 tablespoon water
For the teriyaki chicken, chicken thighs are my top choice. They stay juicy and tender. Using skin-on and bone-in thighs adds great flavor. The soy sauce gives that savory touch. Honey adds sweetness, balancing the salt. Rice vinegar brings a nice tang, while sesame oil adds depth. Minced garlic and grated ginger give that classic, fresh flavor. Cornstarch and water make a nice glaze at the end.
Optional Garnishes
- 2 green onions, finely chopped (for garnish)
- Sesame seeds (for garnish)
Garnishes can elevate the dish. Chopped green onions add color and crunch. Toasted sesame seeds give a nutty flavor. These extras make the dish look and taste even better.
Variations in Ingredient Choices
- Low sodium alternatives
- Substitutes for honey
If you prefer less salt, use low sodium soy sauce. You can also switch honey for maple syrup or agave. These swaps keep the flavor while fitting your diet. You can change ingredients based on what you have. This recipe is flexible, so feel free to get creative!
Step-by-Step Instructions
Preparation Steps
1. First, preheat your oven to 400°F (200°C). This helps cook the chicken evenly.
2. Next, prepare your baking dish. Line it with parchment paper. This makes cleanup easy.
Making the Teriyaki Sauce
1. In a mixing bowl, combine the soy sauce, honey, rice vinegar, sesame oil, minced garlic, and grated ginger.
2. Whisk these ingredients well. Mixing them well is key for great flavor. Each ingredient adds its own taste, making the sauce rich and tasty.
Baking the Chicken
1. Place the chicken thighs in the baking dish, skin side up. Pour the teriyaki sauce over the chicken. Make sure each thigh is coated.
2. Bake in the oven for 30 minutes. This helps the chicken absorb all the flavors.
3. To check doneness, use a meat thermometer. The chicken should reach 165°F (75°C). The skin should look golden and crispy.
4. If you want extra crispiness, switch to broil in the last few minutes. Keep a close eye to prevent burning.
5. After baking, let the chicken rest for 5 minutes before serving. This helps the juices settle for a tender bite.
Tips & Tricks
Marinating Advice
Marinating the chicken is key for flavor. Aim to marinate for at least 30 minutes. If you have more time, one to two hours works even better. This allows the teriyaki sauce to seep in, making the chicken juicy and tasty.
Cooking Tips
For crispy skin, start with chicken thighs that have skin on. Bake at 400°F (200°C) for 30 minutes. After that, brush on some sauce and return it to the oven for 15 more minutes. If you want extra crispiness, switch to broil for the last few minutes. Keep an eye on it to avoid burning.
Common Mistakes to Avoid
Avoid overcooking the chicken. It can dry out and lose flavor. Use a meat thermometer to check the internal temperature. It should read 165°F (75°C) for safe eating. This ensures juicy and flavorful chicken every time.
Pro Tips
- Use Fresh Ingredients: Always opt for fresh garlic and ginger for a more vibrant flavor in your teriyaki sauce.
- Marinate for Extra Flavor: If time allows, marinate the chicken thighs in the teriyaki sauce for a few hours or overnight for enhanced taste.
- Thighs vs. Breasts: Chicken thighs are ideal for this recipe as they stay moist and tender, but you can substitute chicken breasts if preferred; just adjust the cooking time.
- Crispy Skin Finish: Broiling the chicken in the last few minutes of cooking will give you that desirable crispy skin; keep a close watch to avoid burning.
Variations
Alternative Cooking Methods
You can cook teriyaki chicken in different ways. Grilling gives a nice smoky taste. It also adds crispy edges. To grill, marinate the chicken first. Then, cook it on medium heat until done.
A slow cooker is another good option. Just place the chicken and sauce in the slow cooker. Cook on low for 6 to 8 hours. The result will be tender and juicy chicken.
Flavor Adjustments
You can change the flavor of your teriyaki chicken easily. For more heat, add chili flakes or sriracha. This gives a spicy kick to the dish.
If you want it sweeter, add more honey or brown sugar. You can also mix in orange juice for a fruity twist. The balance of sweet and salty is key to a great teriyaki sauce.
Different Cuts of Chicken
While chicken thighs shine in this recipe, you can use chicken breasts too. They will cook faster, so check for doneness early. Breasts can be a leaner option, but they may lack some juiciness.
You can choose boneless or bone-in chicken. Bone-in chicken often has more flavor. Boneless is easier to eat and cook. Just remember, cooking times may vary with different cuts.
Storage Info
Refrigeration Guidelines
To store leftovers, let the chicken cool first. Once cool, place it in an airtight container. This keeps the chicken fresh and tasty. It will last up to four days in the fridge.
For reheating, you can use the oven or a microwave. If using the oven, preheat it to 350°F (175°C). Place the chicken in a baking dish. Cover it with foil to keep moisture in. Heat for about 15-20 minutes or until warm.
In the microwave, place chicken on a plate. Cover it with a microwave-safe lid. Heat for about 1-2 minutes, checking often to avoid drying out.
Freezing Instructions
To freeze chicken thighs, wrap them tightly in plastic wrap. Then place them in a freezer bag. Remove as much air as possible. This helps prevent freezer burn. You can freeze them for up to three months.
For thawing, the best method is in the fridge overnight. This keeps the chicken safe. If you need it faster, you can thaw in cold water. Just change the water every 30 minutes.
Shelf Life
Baked teriyaki chicken lasts four days in the fridge. In the freezer, it keeps well for three months. Always check for any signs of spoilage before using leftovers. Enjoy your flavorful meal knowing how to store it right!
FAQs
What can I serve with Baked Teriyaki Chicken Thighs?
You can serve baked teriyaki chicken thighs with many tasty sides. Here are some ideas:
- Steamed rice or jasmine rice
- Stir-fried vegetables like broccoli or bell peppers
- Noodle dishes, such as soba or udon
- A fresh salad with crunchy greens
These sides add nice flavors and textures. The sweet and savory taste of the teriyaki pairs well with fresh veggies. You can also add sesame or soy sauce to your sides for extra flavor.
Can I use other proteins for this recipe?
Yes, you can use different proteins in this recipe. Here are some options:
- Chicken breasts for a leaner choice
- Pork chops for a rich taste
- Tofu for a plant-based option
- Salmon for a seafood twist
When using other meats, adjust cooking times. For chicken breasts, check them at 25 minutes. Pork and salmon may take less time. Make sure to cook until they reach safe temperatures.
How do I know when the chicken is done?
You can tell when the chicken is done by looking for a few signs:
- The skin should be golden brown and crispy.
- Juices should run clear when you cut into it.
- Use a meat thermometer. The internal temperature should be 165°F (75°C).
Checking these points ensures your chicken is juicy and safe to eat. Enjoy your flavorful meal!
Baked teriyaki chicken thighs offer great flavor and options. We covered the main ingredients, cooking steps, and tips to avoid mistakes. You can use various cooking methods or chicken cuts to suit your taste. Store leftovers properly to keep them fresh. Whether you serve it with rice or try different proteins, this dish is a winner. Enjoy making this meal, and have fun experimenting with flavors!